How to Contribute to Open-Source Project on GitHub

So you've been reading articles about how to become a better software developer on the internet and inevitably, you've stumbled upon one common advice across the articles – contribute to an open-source project.
And you’re thinking, “Sure but how? How do I contribute exactly?”
Well in this article, I'm going to walk you through a step-by-step process on contributing to your first open-source project. This article is meant to teach you the "how" part, the technical part.
Or in other words, this is a technical tutorial on how to contribute to a public repo on GitHub, exciting stuff.
The project that you are going to contribute to is a small little project of mine called the Guestbook. It's basically a website where you can leave some comments, maybe an advice, some quotes that inspires you, a joke – anything at all.
Hopefully by the time you read this, there are some comments made by other people and not just me 🥲
Gentle reminder
Before we proceed to the steps, I want to talk about contributing to an open-source project. Specifically, what can you contribute because it is one of the most if not the most important steps to all this.
While contributing to an open-source project is a great thing to do, there are some contributions that are made just for the sake of making a contribution.
You don't want to spam the maintainer with bad contribution because it does not help anyone, and you should not be proud of that.
If you think you can contribute meaningfully to a project by fixing a bug, adding new features, or even improve the documentation – by all means go for it.
With that out of the way, let's get into the tutorial.
Forking the repository
The first step if you want to contribute to an open-source project on GitHub is to fork the repo that you want to contribute to.
Now you may be wondering, why do we have to fork the repo? Why can't I just clone it?
Well, it all depends on what you're trying to do.
In some cases, you might just want to run the project locally and see how things are done, without the intention of making any changes to the original repo – if that's the case, you can just clone it.
In our case however, we want to run it locally. But we also want to make some changes, and contribute back to the original repo with our changes, which is why we need to fork it.
Forking vs Cloning
When you clone a repo, you will have a copy of the repo locally but it is still pointing to the original GitHub repo.
With cloning, you will run into a problem when you try pushing your code back to GitHub. You won't be able to do that because you don't have a write permission to that particular repo.
By forking however, you kinda clone it into your GitHub repo, in which you will have the write permission.
Technically it is your repo now, and when you clone, edit, and try to push new updates back to GitHub, it will succeed – because it's your repo.
That's why you need to fork it first, so that you will have the write permission.
So go ahead and fork this repository.
Clone the forked repository locally
Now that you have this repo under your name, you can clone it as usual and try to run it locally.
Note that this project is a Next.js project. You will need to install node and run npm install or yarn to install the dependencies.
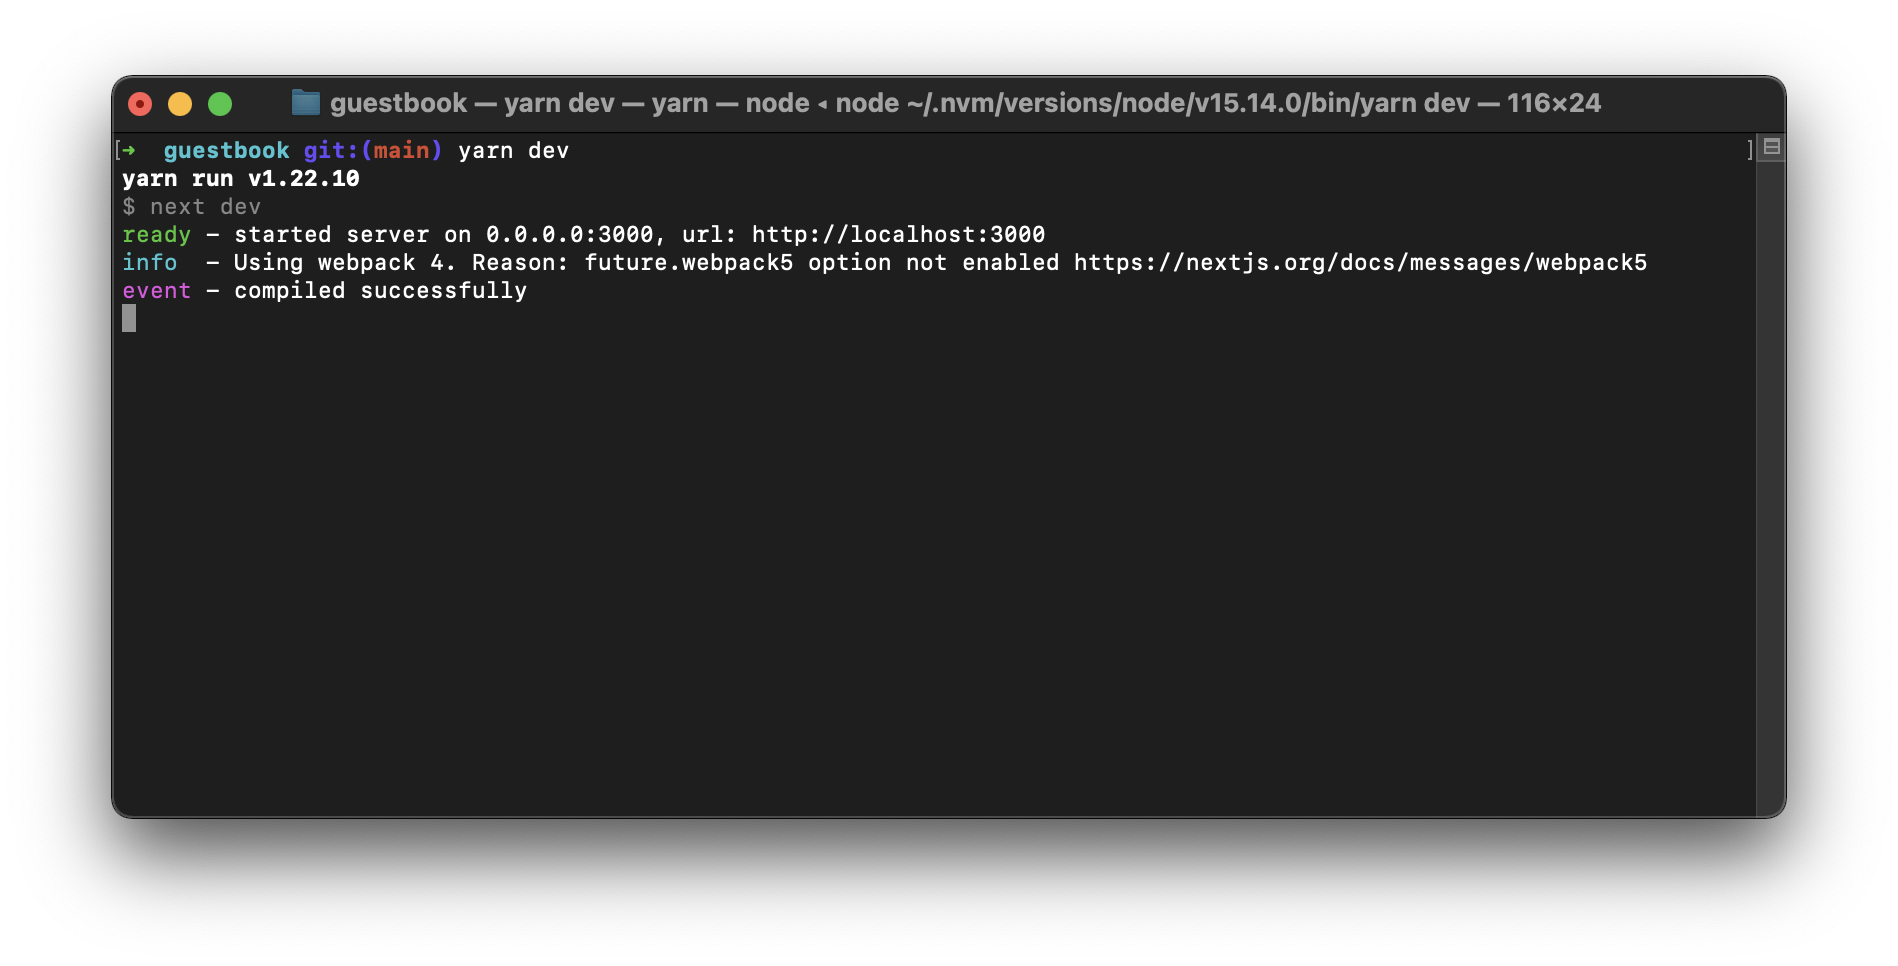
Once the dependencies are installed, you can try to run it by running npm run dev or yarn dev and hopefully you will see this in your terminal.
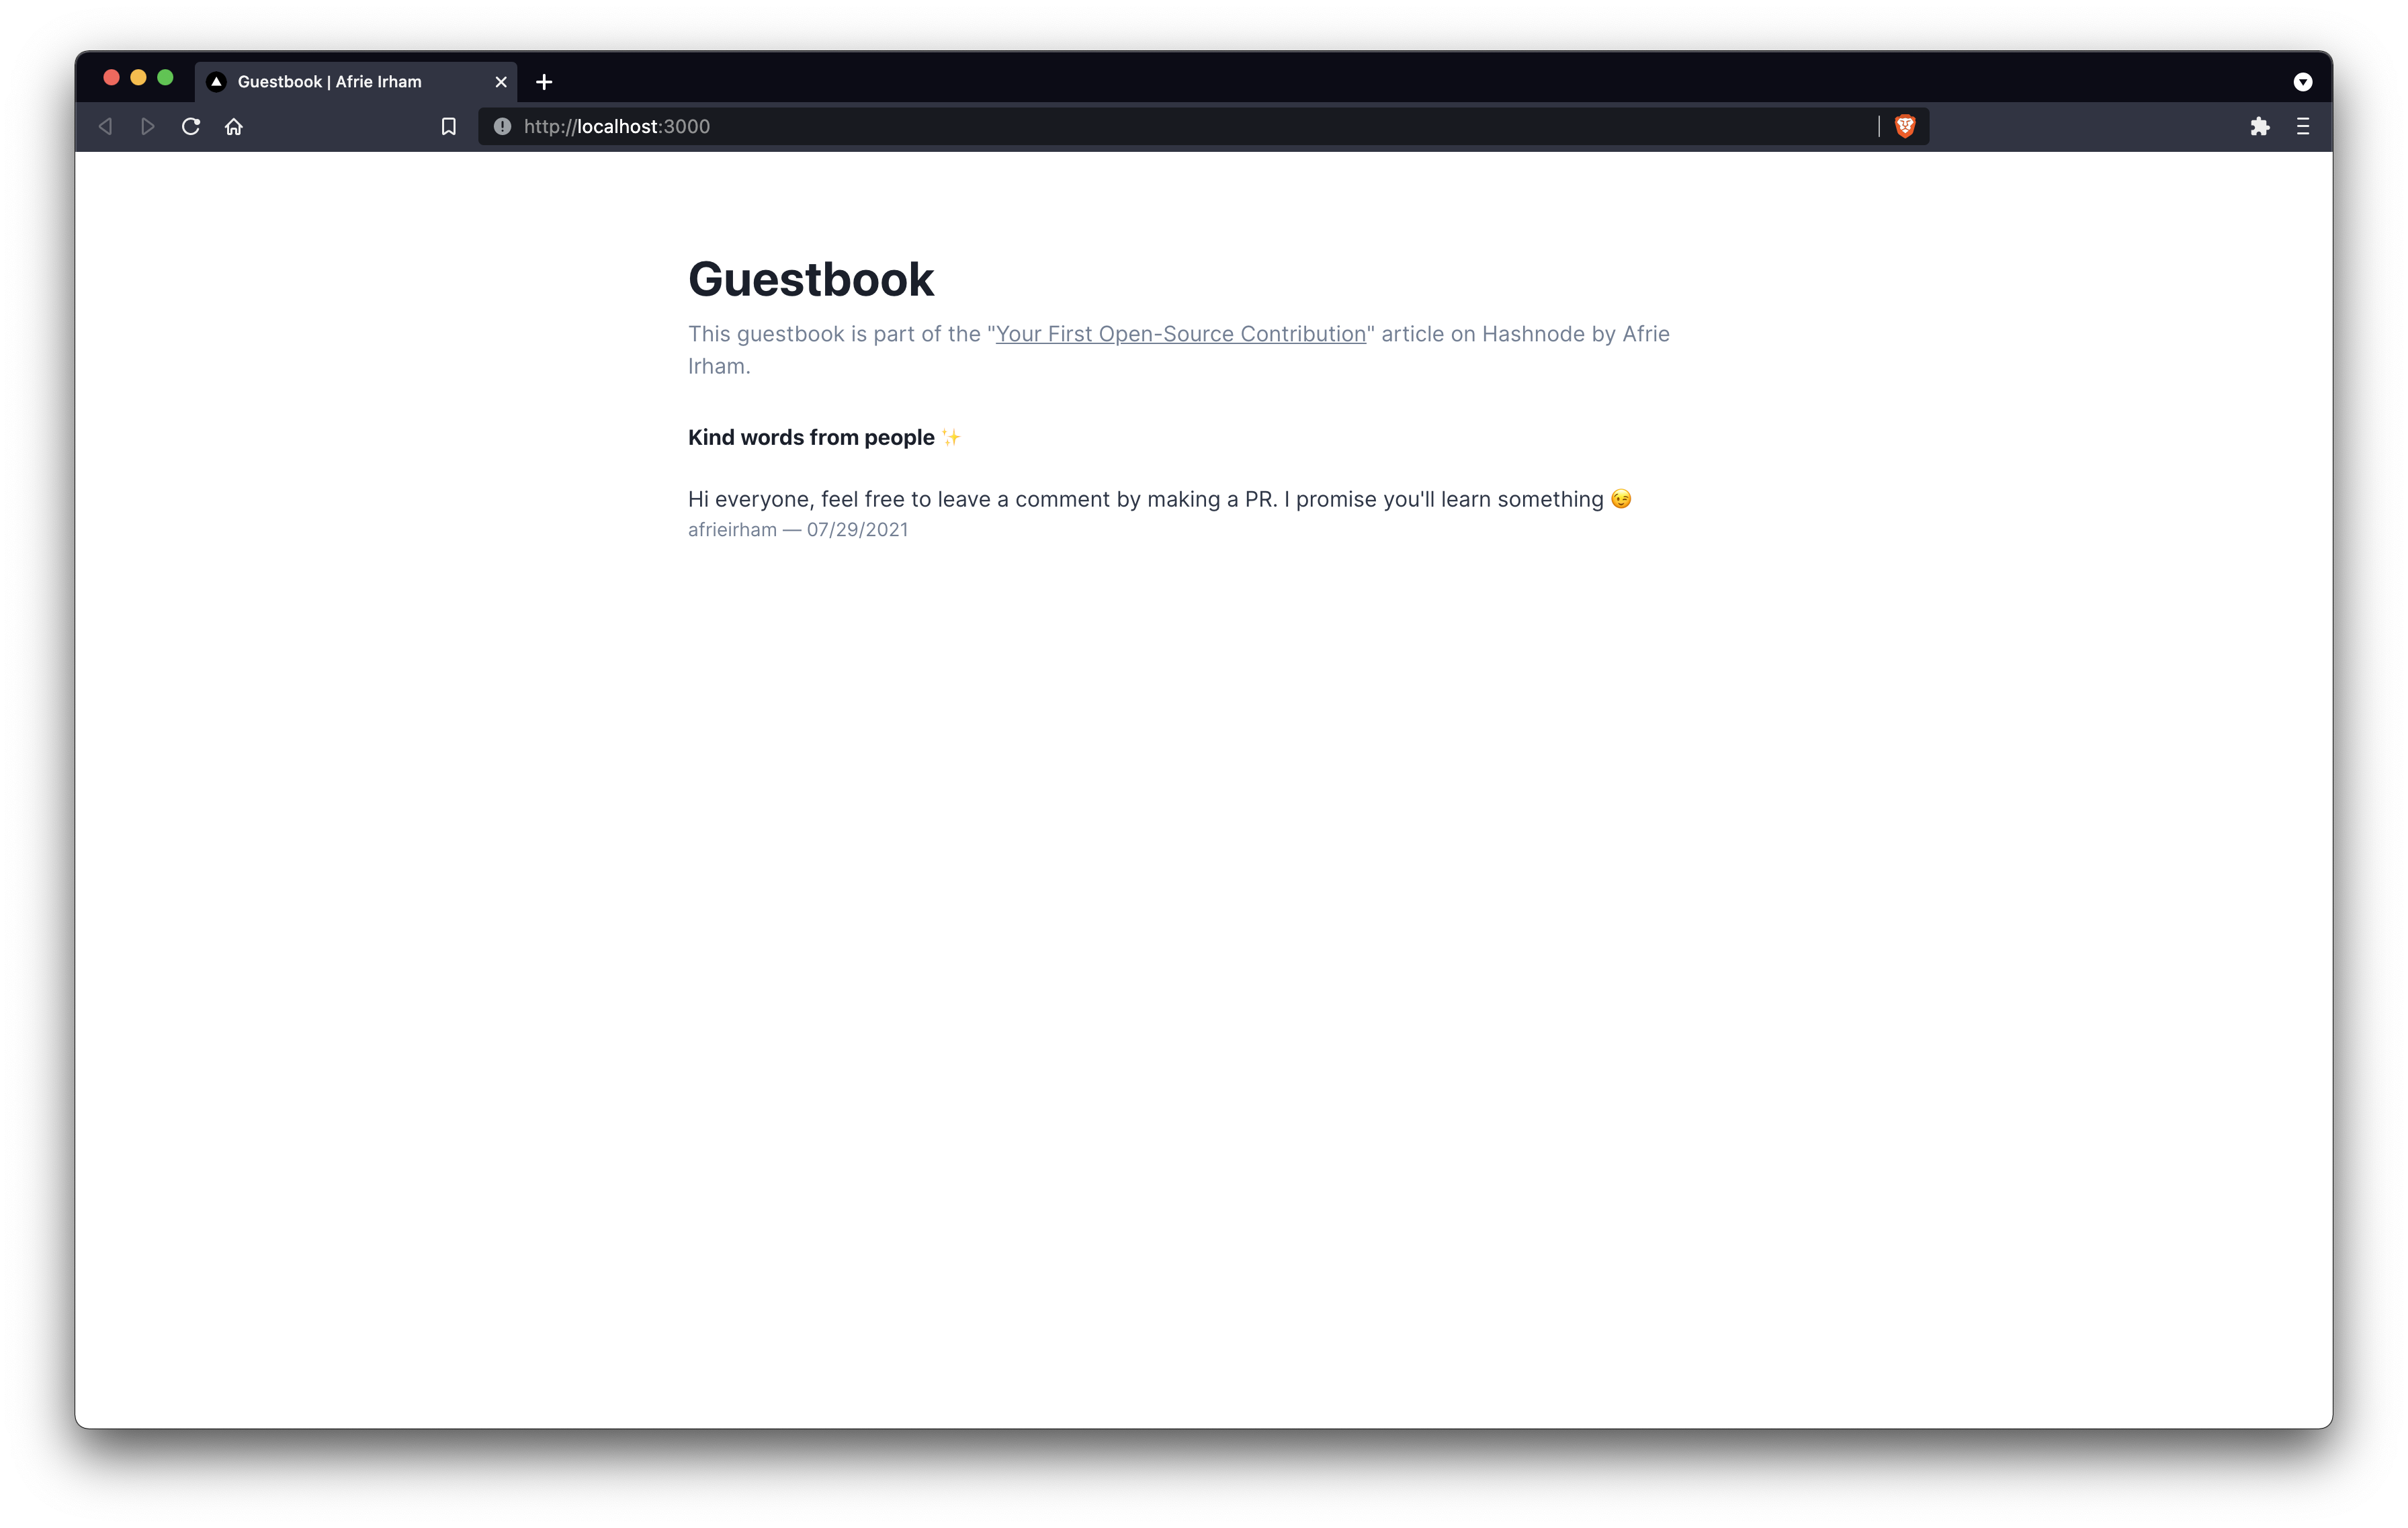
By now you should be able to go to your localhost and see the guestbook page.
If everything went well, you can proceed to the next step.
Create a new branch
Now that you can run the project locally in your machine, you should be able to make some changes to it.
But before you start doing any changes, you should create a new branch and name it <your_github_username> . For example if I want to create a new branch, I will name it afrieirham .
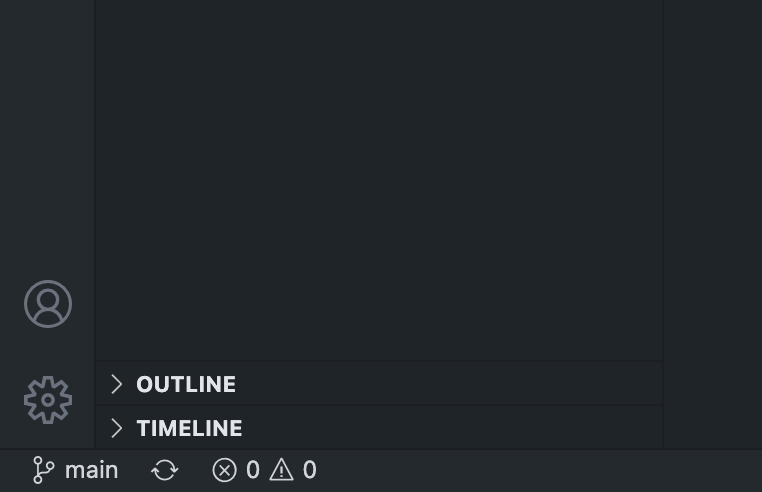
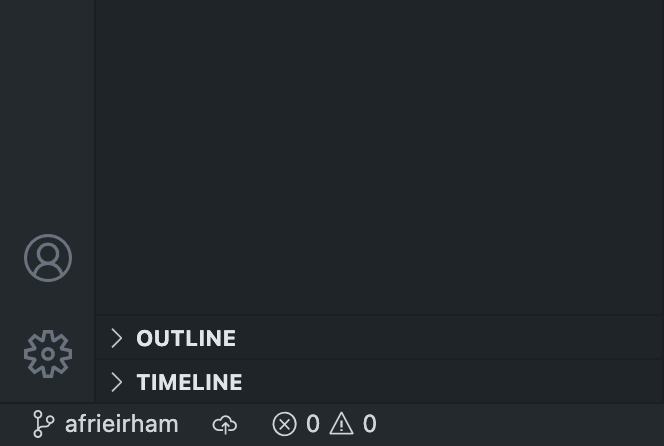
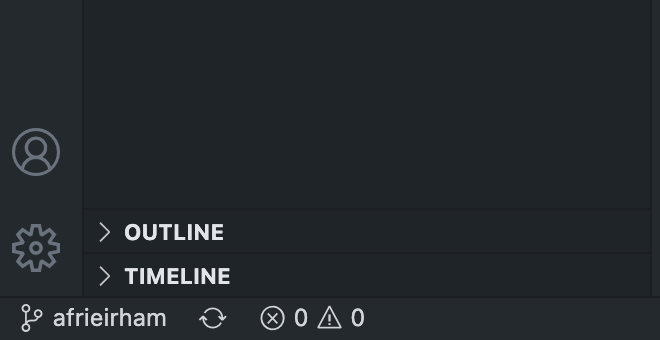
You can create a branch however you want but the way I usually do it is using VS Code. At the bottom left your VS Code, you will see a main text.
You can click the Create new branch from... and enter your branch name.
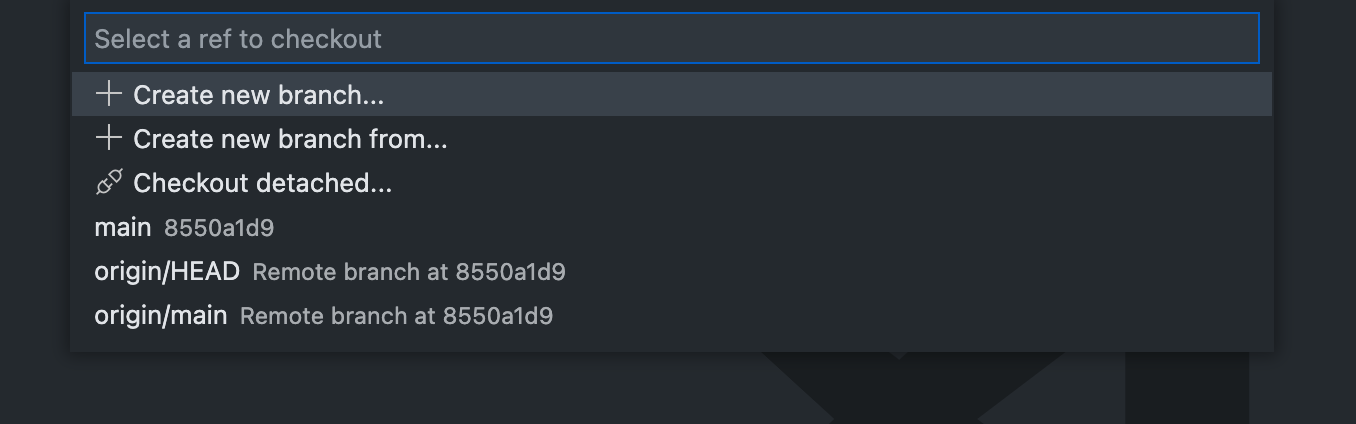
Then select the main branch for this.

This will create a new branch called afrieirham from the main branch.
Now if you notice, it will change it to afrieirham which means I have successfully create a new branch. Hopefully yours will display your GitHub username.
If you find this method a bit tedious, you can always use the command line.
git checkout -b <your-github-username>
Quick Note ✍️
If you're contributing to a real project, usually you will name your branch based on what you're trying to do.
For example it might be a new feature called feature/upload-photo or a bug fix called fix/form-not-working .
It all depends on the project maintainer if they have a guideline for branch name. For this tutorial, you just have to use your GitHub username, that’ll makes it easier for me, thanks. 🙇🏻♀️
Making your changes
Now that you're on a new branch, you can start making your changes safely. To sign the guestbook, you need to create a new file in the sign-here folder located in the public folder.
You’ll need add a new JSON file with your GitHub username as the title. In my case for example, I will create a new file called afrieirham.json. Yours would be your-github-username.json.
Then you can copy the template I provided in the README or copy the code below.
{
  "body": "Change this with your comment",
  "date": ""
}
Paste the code into the JSON file you’ve created and add your comment accordingly.
To add the date, you’ll need to go to this link and click on the “Copy to clipboard” button.
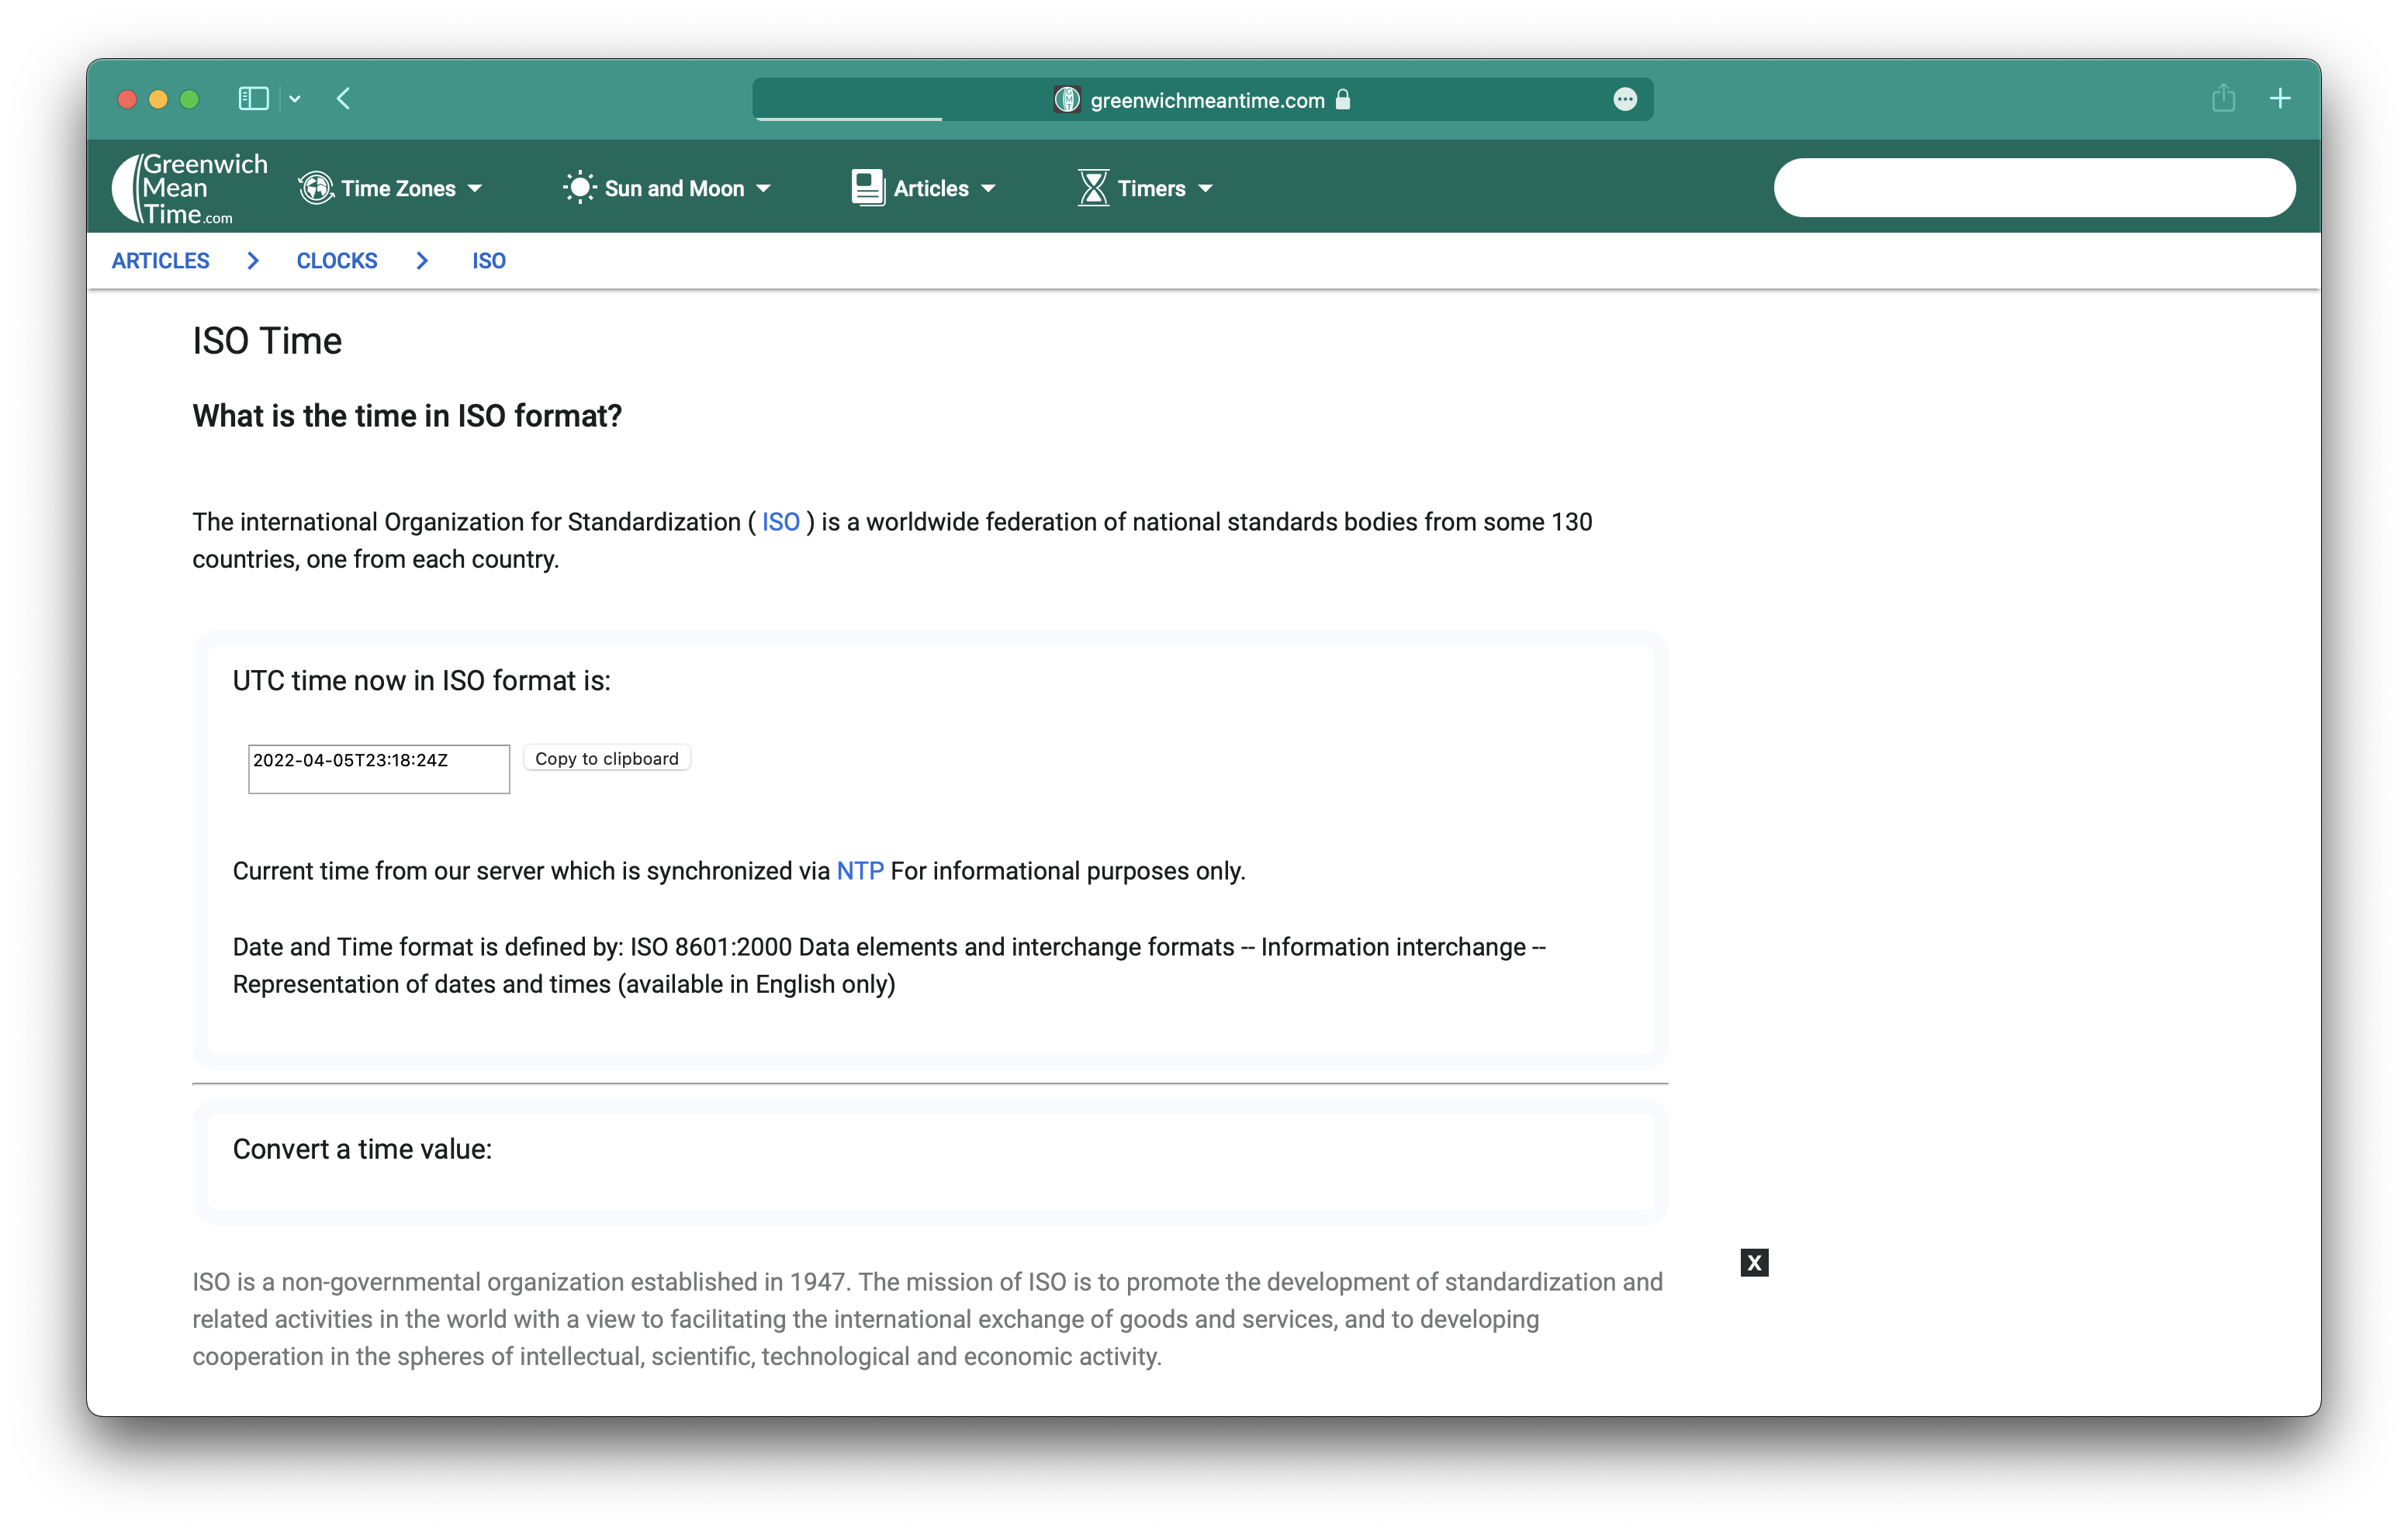
You can then paste it into the date section of the template and it will look something like this.
{
  "body": "Your comment",
  "date": "2022-04-04T23:25:49Z"
}
I hope my instructions are clear.
You can also refer the README file in the repo on how to get started, the instructions should be similar to this article.
Committing your changes
Once you've made your changes, you can proceed into the next step which is to commit your changes.
If you already know how to do this, go ahead and commit the JSON file you've created, you can skip this part.
If you don't, I will show you step by step on how to commit your changes with VS Code.
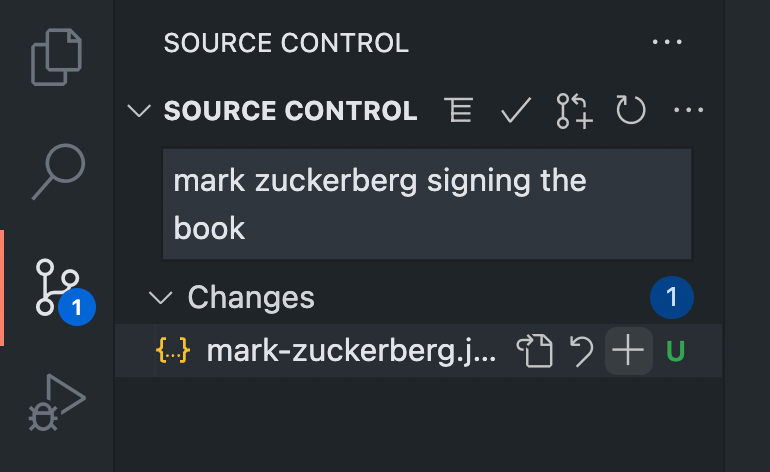
First, you need to go to the git tab in VS Code, it's the icon with the blue number badge.
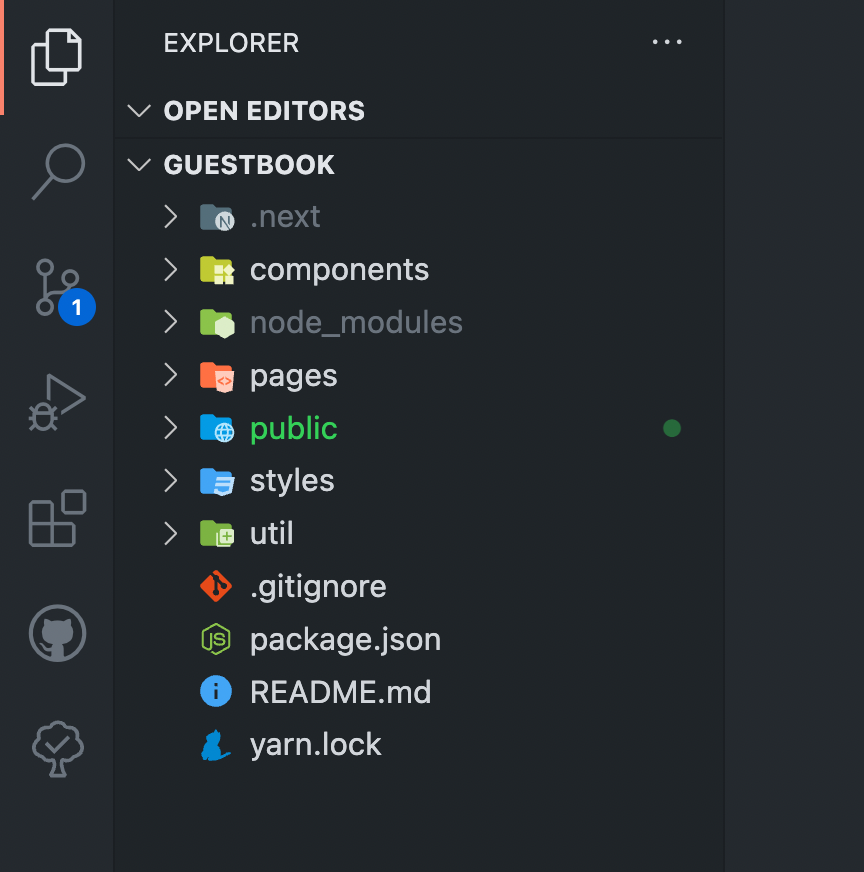
When you click it, you should see something like this.
By right it should show that you’ve added a new JSON file. It's fine if it shows more than that, you probably have explored the other files and make other changes if that's the case.
However, you will only need to commit the JSON file that you just made, that's the only file you should be contributing in this tutorial.
Feel free to do any other changes for yourself, just don't include it when you want to contribute for this tutorial.
You should write a commit message in the input box. Just write anything to be honest, this message will be stored in the GitHub repo though, so be sensible.
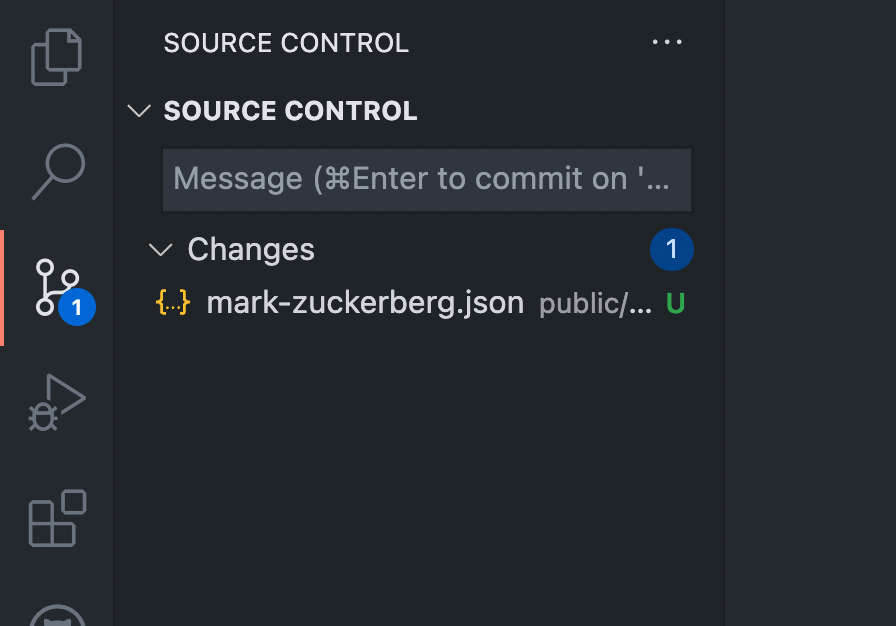
Then you can click on the + plus sign when you hover on the JSON file. This step is called staging your changes.
It should show something like this. This means that the changes you've made is ready to be committed into the repo.
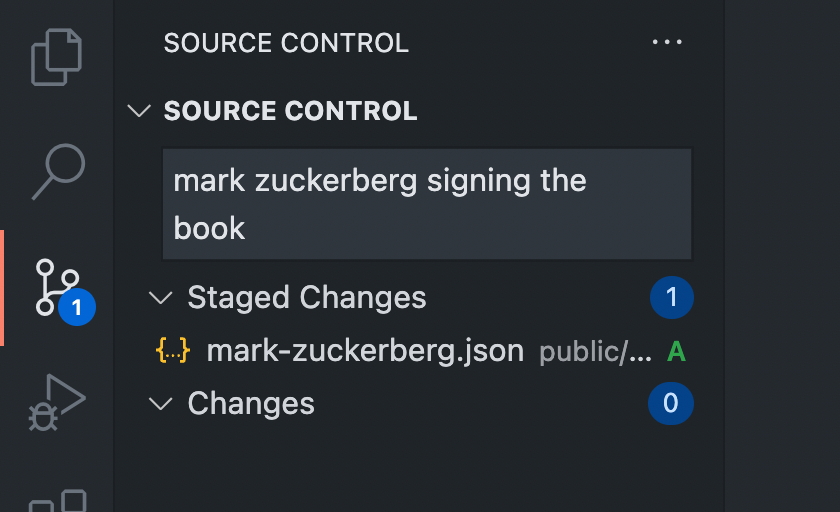
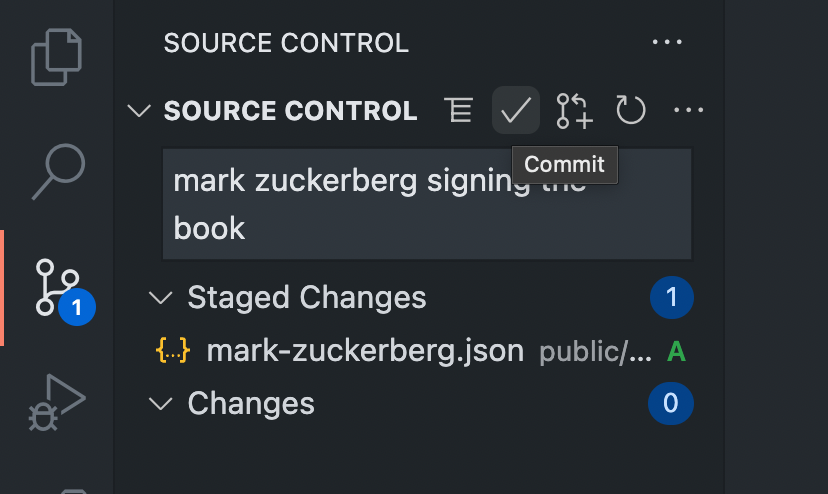
From here, you can either click on the ☑️ icon or press command + enter for Mac or control + enter for Windows.
You might need to setup your Git config if you've never used Git before, but I hope you know how to do that.
If the JSON file is gone from the git tab in VS Code, you now have successfully make a git commit, yeay! ✨
But there's still more steps need to be done.
Pushing your changes to GitHub
This step is pretty easy and should be a quick one. All you have to do is just click on the cloud icon at the bottom left of VS Code.
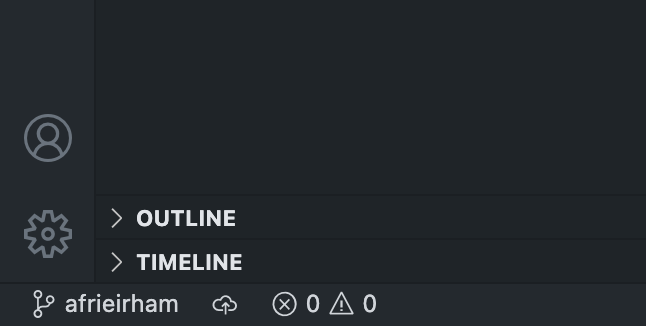
If the icons changed to this icon, you're all good.
Making a Pull Request (PR)
Pull Request is arguably the most important step to all this. It is a way for you to make a merge request to my GitHub repo so that your code will be reflected on the website once I approve it.
To make a PR, you need to go to your forked repo, or the original repo and you might see something like this. Just click on the Compare & pull request button.

If you don't, you can click on the Pull Request tab and then click on the New Pull Request button. You should be on this page after you click on the button.
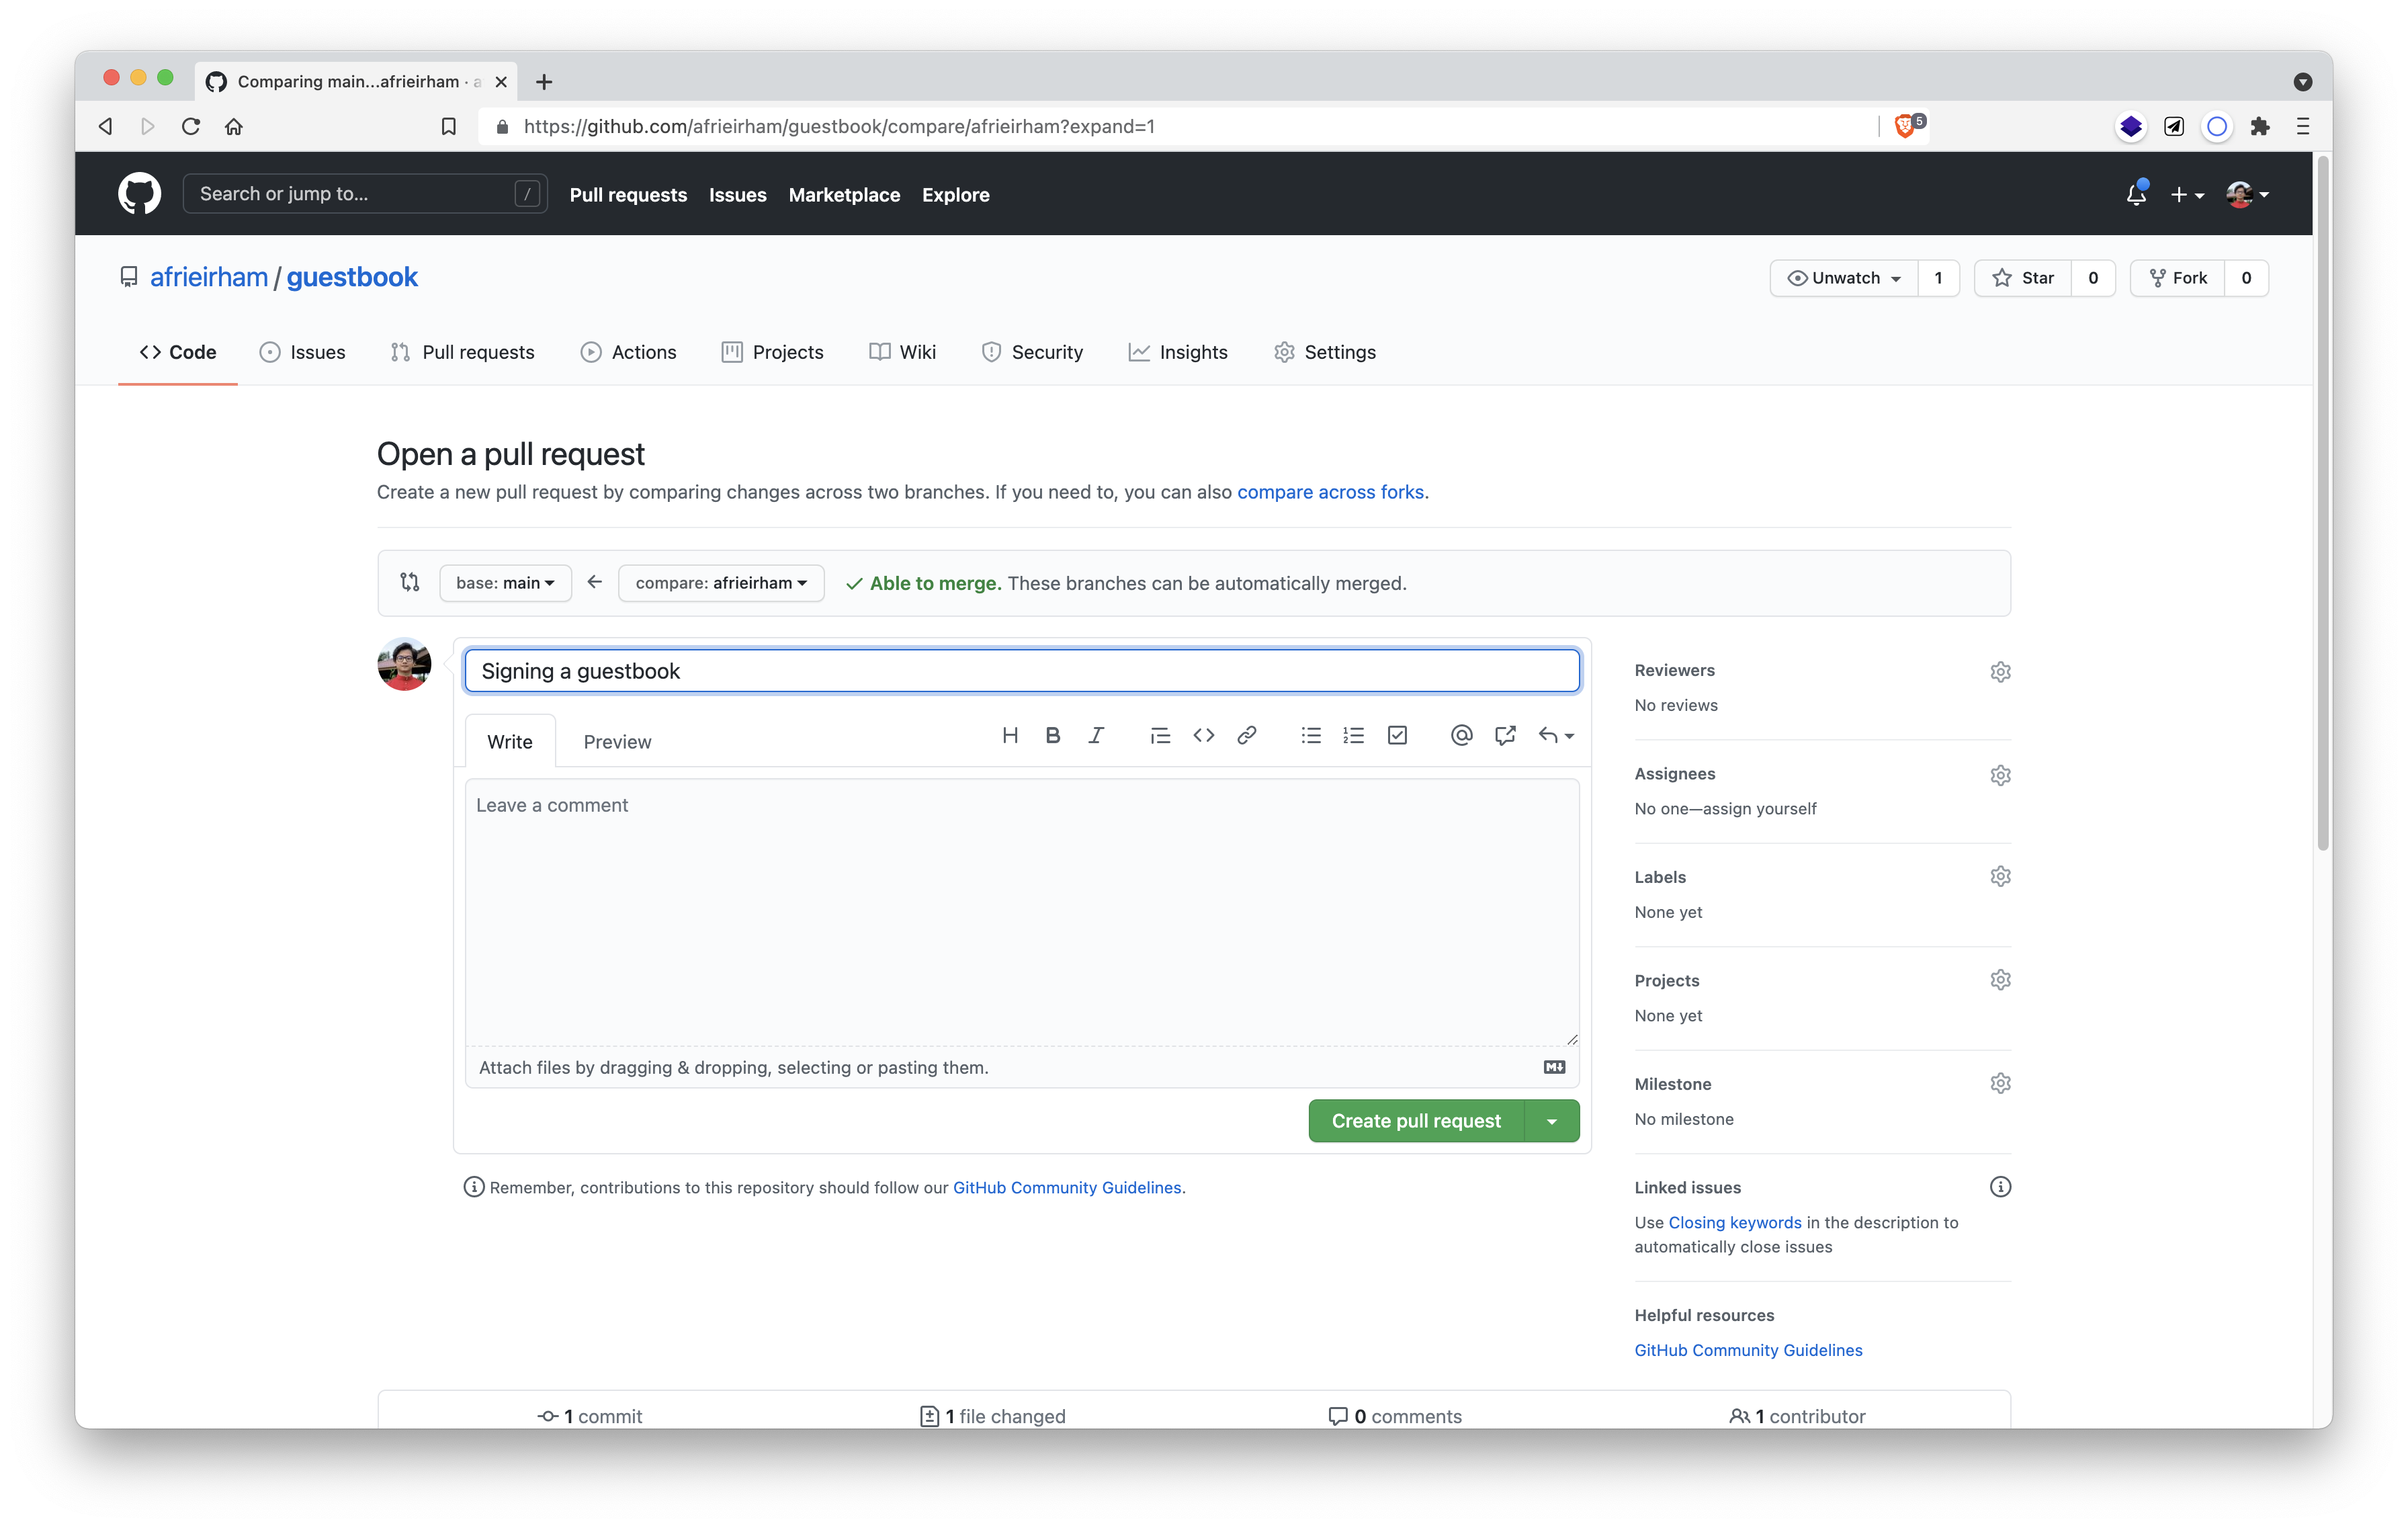
When you're on that page, you can write something if you want. Ideally in a real open-source project, you should write about the changes you've made and what are the PR is all about.
It will help the maintainer or the owner of the repo to review your PR and understand what you're trying to do.
Before you click on the Create pull request button, you should make sure that you are trying to merge the correct branch to the main branch.

Things you should double check:
- Base repository is
afrieirham/guestbookand the base ismain - Head repository is
<your_github_username>/guestbookand the compare is<your_github_username>
If everything is correct, you can now go ahead and click on the Create pull request button. If this is your first PR – congrats! 🥳
The whole process you just went through is how you would do it in any “real” project, and possibly in your job too.
It will not be exactly the same because different organization have different workflows but generally it is the same.
Starting from cloning the project, making your changes locally, making your first commit, pushing your code to GitHub, and finally make a PR for that – this workflow is generally the same across all organization.
From here, all you can do is just wait for me to merge your code into the main branch. I will try my best to merge your PR as soon as possible.
After that, hopefully your comment will appear on the guestbook.afrieirham.com, you can always check if your code has been merged or not by going to the PR page again.
Conclusion
By now I really hope you've learned something from this mini project. I hope that you have a clearer vision on how people use GitHub to contribute to an open-source project.
I would also like to point out that it is not necessarily only applicable to an open-source project. You can use the same method in your own project, and you might find some similarity when you start working in a real project.
There might be extra or less steps involved, but I hope this tutorial will be a good foundation for you to learn a more complicated workflows in your organization.